Fall Tapas, Gather Your People


Holiday season is fast approaching!  Noooooo!!!  It isn’t like I don’t have a great time and, let’s face it, after this summer (and the heat that is still lingering in San Diego) we are all ready for some slightly chillier weather.  But, for me this means that I only have a few more months to get my New Year’s resolutions resolved, it starts to get dark earlier; and every store in the country suddenly turns into the Christmas consumer-recruiter. I feel like time runs away from me more, one holiday leads to the next, and there are so many events scheduled on the calendar.  Luckily my friends and family decided a long time ago to bail on the obligatory Christmas gift giving; and just figure out more times for us to gather together and really celebrate our love and soulful connections.  

With all of the chaotic schedules in the family, we also learned that having a gathering doesn’t have to be stressful or perfect.  Sometimes you just have to throw together a couple of munchies and put the word out for the family and friends to bring something to contribute to the table.  So, what I like to do is turn the gathering into a Tapas Party. Everyone makes a couple of tasty appetizers, I make a big batch of sangria and we put on some great music. Never any pressure to dress up, in fact often times I request people show up in comfy pajamas. We spend an evening treasuring the real blessings in life:  love, laughter and each other. 

Seasonal, Nutrient Rich, Budget Friendly….and Delicious?

Super Foods So Easy and Tasty To Use!

Super Foods So Easy and Tasty To Use!

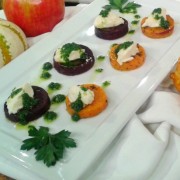
I am always trying to experiment with ingredients that are in season, nutrient rich, budget friendly; and can be used in recipes that allow me to make most of the components ahead of time. This way I can do some prep the night before, or even a couple days in advance.  My upcoming Tapas Party will include two recipes I created that are festive and tasty, and follow all of the criteria above. Sweet Potato Medallions with Roasted Garlic Goat Cheese and Parsley Pesto are perfect served warm or chilled, and give us a boost of beta carotene and powerful antioxidants.  My Ancho Turkey Tostadas with Radish and Cabbage Slaw include walnuts, chilies, onions and the cruciferous super star: cabbage.

The day before the party, I can toss almost everything in the oven: the garlic for the goat cheese, the sliced sweet potatoes, the tortillas for the tostadas.  I then saute a base of onions, garlic and peppers so I can add slices of turkey cutlets (or even better yet make use of leftover turkey from Thanksgiving) and braise it low and slow with some ancho chili and organic free range chicken broth, until it is super tender.  The evening of the party, I can assemble my tapas by mashing the roasted garlic with goat cheese as a topping for the roasted sweet potatoes and drizzling with parsley pesto. The braised ancho turkey tops my baked tostadas and is finished with the fresh slaw.  And finally my Spiced Cider Sangria is a refreshing and festive way to wash it all down…perfect for the season but cooling at the same time.

So, with all of this easy and fun deliciousness happening, fill up your belly and your soul.  Gather your people for a fun Fall Tapas party! Check out my recipes for both tapas, plus my favorite bonus holiday cocktail, Spiced Cider Sangria.
Mini Ancho Turkey Tostadas with Radish Cabbage Slaw
Turkey is braised until tender with Ancho chili and spices, then served on baked corn tortilla tostadas and topped with a crunchy slaw of radish and cabbage.
Write a review
Print
Prep Time
15 min
Cook Time
40 min
Prep Time
15 min
Cook Time
40 min
For the ancho turkey
  1. • 1 red bell pepper, small diced
  2. • 2 tsp. ground ancho chili powder
  3. • 1 pound turkey breast cutlets*
  4. • 1 tsp. kosher salt
  5. • 1 tsp. cumin
  6. • 1 c. small diced onion
  7. • 1 serrano chili, minced
  8. • 6 cloves garlic, minced
  9. • ½ c. toasted walnuts, chopped
  10. • 2 TB lime juice
  11. • 1 diced tomato
  12. • 3 c. chicken broth
For the tostadas
  1. • 10 corn tortillas
  2. • Vegetable oil
  3. • Kosher salt
For the slaw, toss together
  1. • 2 c. chiffonade cabbage
  2. • handful of cilantro, minced
  3. • 4 radishes, finely julienne
  4. • the juice of 1 lime
  5. • ½ tsp. each kosher salt and dry oregano
Instructions
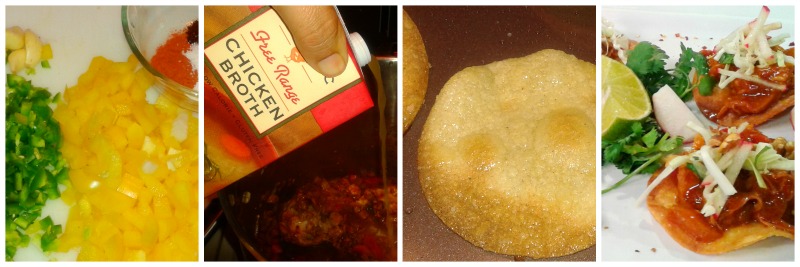
  1. Heat a small amount of oil in a sauce pot. Sautee the onion until caramelized. Add turkey, garlic, serrano, bell pepper, ancho powder, cumin and salt. When turkey is browned, stir in lime and chicken broth.
  2. Bring to a boil, then turn down to a simmer and cook uncovered for 40 minutes, or until turkey is shreddable tender. Using a slotted spoon, pull turkey pieces out and shred it. My trick to shredding meat easily is to use two forks. Keep the shredded meat in a bowl and turn the heat up on the remaining juices in the pot. Let it cook uncovered until the liquid has reduced to about 2 cups. This concentrates the flavor and makes the turkey saucy. Stir the turkey and toasted nuts into the juices.
  3. Meanwhile, brush tortillas lightly with oil. You can either cut them in fourths, or use a 3” round cookie cutter to cut them. Transfer them to a sheet pan and sprinkle with salt. Bake at 400 degrees for 6 minutes, then flip the pieces over and continue baking approximately 6-8 minutes longer; until crispy all the way through.
  4. Serve the little tostadas with turkey and top them with the slaw. Serve with cilantro and a slice of lime. Optionally, to make this a more substantial tostada, you can also spread some re-fried beans on each one before topping with the turkey.
Notes
  1. Substitute chicken by using 6-8 boneless skinless chicken thighs in place of turkey.
  2. Make use of all of that leftover turkey from Thanksgiving, by adding your already shredded and cooked turkey with the broth. You would reduce the braising time to about 20 minutes.
  3. It probably goes without saying, but this would be equally delicious, but a smidgeon more evil, if you wanted to use pork butt (just cut it into 2 inch chunks and braise it for about an hour.
The Flavor Conspiracy https://flavorconspiracy.com/
 collage tostadas 


Sweet Potato Medallions with Roasted Garlic Goat Cheese and Parsley Pesto
Yields 20
Sweet potatoes sliced into medallions and baked with garlic and herbs, then topped with a tangy mixture of goat cheese and roasted garlic. A drizzle of parsley pesto not only adds healthy nutrients, but gives it a bright fresh flavor.
Write a review
Print
Prep Time
15 min
Cook Time
40 min
Total Time
55 min
Prep Time
15 min
Cook Time
40 min
Total Time
55 min
For sweet potato medallions
  1. • 2 large enlongated * sweet potatoes
  2. • 3 cloves garlic, minced to a paste
  3. • ¼ c. olive oil
  4. • 2 TB minced fresh thyme
  5. • Kosher salt and chili flakes
For goat cheese
  1. • 3 ounces goat cheese seasoned with salt and pepper
  2. • 10 cloves garlic, peeled
  3. • 1 TB each water and olive oil
For pesto
  1. • 1 cup parsley roughly chopped, stems and leaves
  2. • Olive oil
  3. • 1 clove garlic, minced
  4. • ½ tsp. kosher salt
Instructions
  1. Cut sweet potatoes into medallion slices, approximately ¼ inch thick. For a more uniform shape, you can use a 1 ½” cookie cutter to cut each slice. Toss with thyme, minced garlic and olive oil. Transfer to a sheet pan, sprinkle with salt and chili flakes and roast in a 425 degree oven for 25-35 minutes or until browned on the outside and fork tender on the inside.
  2. For goat cheese: Place garlic in a small baking dish with olive oil and water. Cover with foil. Roast in a 425 degree oven for 20 minutes, or until the garlic is tender and caramelized. It should easily be mashed with a fork. Mash the roasted garlic with the seasoned goat cheese.
  3. For pesto: Place parsley and 1 clove of minced garlic in a blender with a few fat pinches of salt. Add about ½ c. of olive oil. Turn the blender on and then drizzle in more olive oil if needed to make sure that parsley is pureed. The pesto should be a bit oily, which allows it to be drizzled and then leftovers can be frozen for future use.
  4. To assemble:Serve medallions of sweet potato spread with a small amount of goat cheese and a drizzle of pesto.
Notes
  1. When putting something like goat cheese on a tapa, you can use a couple of different techniques to make them look more uniform and make sure you have the same amount of goat cheese on each serving: Make quenelles, which are little football shaped blobs, using two small spoons to shape them. OR add the cheese to a sandwich bag and snip one of the ends and squeeze out even little "kisses" of goat cheese.
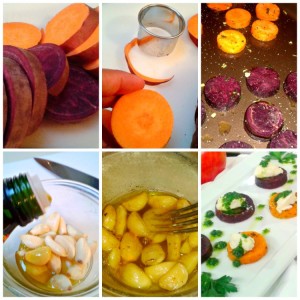
The Flavor Conspiracy https://flavorconspiracy.com/
collage sweet potato,jpg

Spiced Cider Sangria
Everything you love about spiced cider, mixed with the festive and refreshing taste of a white sangria and a splash of bourbon.
Write a review
Print
Prep Time
15 min
Total Time
15 min
Prep Time
15 min
Total Time
15 min
Ingredients
  1. • 2 quarts apple cider
  2. • 2 cinnamon sticks
  3. • 1 tsp. whole cloves
  4. • 1 TB fresh ginger root
  5. • 16 oz. ginger beer (my favorite is Reeds Extra Ginger Brew)
  6. • 16 oz. hard cider
  7. • 1 bottle champagne
  8. • 8 oz. bourbon
  9. • 3 apples sliced thin
  10. • 2 oranges, sliced thin
  11. • 1 lime, sliced thin
Instructions
  1. Heat apple cider with cloves, orange slices, cinnamon and fresh ginger until it comes to a boil. Remove from heat and let it “steep” as it cools to room temperature.
  2. Combine with all remaining ingredients and serve over ice, garnished with extra slices of apple and orange.
The Flavor Conspiracy https://flavorconspiracy.com/

Eat To Beat The Heat

I can’t help it, folks! Its hotter than a witch’s you-know-what. I’m sweating more than I ever cared to. All I can do is keep singing songs about the heat; like “Hot in Herre” (Nelly), “Summertime” (Dj Jazzy Jeff), “Hot Stuff” (Donna Summer) and “Drop It Like Its Hot” (Snoop Dogg).  You know those tunes, reading this right now you have probably starting singing one.  HaaHaa, now it will be stuck in your head, too!

The news and social media are full of posts and ads for how miserable the heat it is…I swear if I see one more fb post with a screen shot of the temperature! What can we do? We are spoiled San Diegans who freeze when the temperature goes below 65 and melt when it goes above 75. So, I have decided that I am going to embrace this heat, abandon caring what my naturally curly hair looks like in the humidity, switch to waterproof mascara so it won’t melt down my face, make time to stop at the beach and jump in that ocean; and get back in the kitchen to create some fabulous recipes to “beat the heat”!

Chill Out!

Of course you don’t feel like standing in front of a hot stove or oven, when you are already sweating your butt off.  So what I do is make a few items that are great served cold, and can be made ahead of time; so I can do all my cooking one day and have a couple days worth of meals ready to go.  This is something I like to do anyways, when I am trying to stay on a healthy track of eating.  If I can cut up some veggies and fruit, cook off some protein and maybe a grain or two in the beginning of the week; it allows me to quickly put together tasty nutritious meals the rest of the days.  The recipes I am sharing with you today are great because not only are they full of all sorts of healthful nutrient dense ingredients, but they are full of flavor and best served chilled.  That’s right, you have lunch or dinner ready to serve straight outta the fridge, so all you have to do is literally chill out and relax. While you are chillin’, you best be checking out my delicious Agua Fresca Elixirs (see blog post from July). Right about now, my super refreshing Watermelon Mint Agua Fresca is calling your name.

Salads That Eat Like A Meal

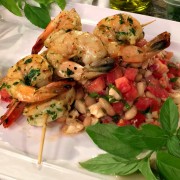
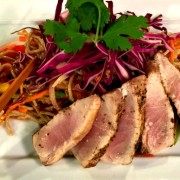
I’m always surprised when I go to someone’s house for dinner and they say they are serving salad with the meal, and all they have is a bowl of lettuce and a bottle of dressing.  At my casa I use salad as an opportunity to grab all of the bits of veggies and fruit that need to get eaten soon.  I add fresh herbs, toasted nuts and seeds and even roasted or sauteed veggies.  My salads eat more like a meal, with a variety of colors and textures that give your mouth some entertainment; so you actually feel satisfied after eating it.  Two of my “beat the heat” recipes I created for this week are Grilled Shrimp on White Bean Insalata Caprese and Seared Albacore on Soba Noodle Salad.  My version of Insalata Caprese goes beyond a plate of mozzarella with tomatoes and basil, by adding crunchy red onions and hearty high fiber/high protein white beans; tossed with a garlicky lemon dressing and citrus marinated grilled shrimp. I go to my favorite fish monger (Catalina Offshore) and grab some local fresh albacore, sear it and serve it on my alternative to pasta salad: Soba Noodle Salad. Rather than being mostly pasta, over half of the bowl is filled with a colorful variety of organic veggies, fresh cilantro and a gingery peach dressing.

collage shrimp insalata caprese


Grilled Shrimp with White Bean Insalata Caprese
Serves 4
This version of Caprese salad: basil, mozzarella and vine ripe tomatoes is enhanced by crunchy red onions, fiber/protein rich white beans and a garlicky lemon dressing. Topped with citrus marinated grilled shrimp, it becomes a satisfying meal, perfect for hot weather.
Write a review
Print
Prep Time
15 min
Cook Time
6 min
Prep Time
15 min
Cook Time
6 min
For the salad
  1. • 1 can white beans, rinsed and drained
  2. • 2 roma tomatoes, small diced
  3. • ½ c. small diced red onion
  4. • 2 cloves garlic, minced to a paste
  5. • 2 Tablespoons extra virgin olive oil
  6. • Juice of 1 lemon
  7. • 4-6 basil leaves, chiffonade
  8. • 8 oz. mozzarella, small diced
  9. • Kosher salt, chili flakes and black pepper
  10. • ½ c. finely minced parsley
For the Shrimp
  1. • ½ tsp. chili flakes
  2. • 1 tsp. kosher salt
  3. • Grated zest of 1 lemon
  4. • Handful of chopped parsley
  5. • 1 clove garlic, minced to a paste
  6. • Olive oil, enough to lightly coat
  7. • 1 pound jumbo raw shrimp (16/20 size), peeled and deveined, tails on
  8. ** eight small bamboo skewers, soaked in water for at least an hour**
For the salad
  1. Toss all ingredients together with a liberal sprinkle of salt, chili flakes and pepper. Cover and chill for few minutes before serving. Better yet, let it chill over night and serve the next day.
For the shrimp
  1. Toss garlic, parsley, lemon zest and chili flakes with about 3 Tablespoons of olive oil. Mix well with a fork, then add shrimp. Chill and marinate for about 20 minutes.
  2. Fire your grill up and get it nice and hot. Add two shrimp to each skewer, making sure to stretch them out a bit. Grill the shrimp for about 3-4 minutes on each side, or until they are opaque. Transfer to a plate and tent with foil.
Plating
  1. Easy, breezy...serve a cup or so of salad on each plate, top with two skewers of shrimp, garnish with more basil and a slice of lemon. Tada!
Notes
  1. When buying shrimp, if you can't get them truly fresh from a local fish monger, buy them frozen. The ones at the grocery store are thawed, even when they call them fresh. They will go bad within a couple of days, so it is better to get them frozen and thaw them overnight in the fridge. Pat them dry with paper towels before marinating.
  2. Shrimp are sold in sizes that are numbered according to how many are in a pound. Example: size 16/20 means that there are 16-20 in a pound. 21/25 means 21-25 in a pound. So the smaller the number, the bigger the shrimp. If you are lucky enough to get anything with a "U" in front, like U10 that means they are super big...only 10 in each pound.
The Flavor Conspiracy https://flavorconspiracy.com/
seared fish soba noodle salad


Seared Albacore with Asian Inspired Soba Noodle Salad
Serves 4
Fresh albacore is seared and served on a salad of chilled soba noodles, crispy julienne vegetables, cilantro, toasted sesame seeds and ginger peach dressing.
Write a review
Print
Prep Time
30 min
Cook Time
10 min
Prep Time
30 min
Cook Time
10 min
For the Fish and Salad
  1. • 8 oz. soba noodles, cooked and chilled
  2. • 1 pound Albacore Tuna, cut into 4 oz portions
  3. • ¼ c. toasted sesame seeds
  4. • Kosher salt and pepper
  5. • Handful of snow peas, julienne
  6. • 1 c. finely julienne bell pepper
  7. • 1 c. finely julienne red onion
  8. • 1 c. finely julienne carrot
  9. • 1 c. finely julienne red cabbage
  10. • Handful of cilantro, rough chopped
For the dressing
  1. • 1 large peach or nectarine, finely chopped
  2. • Zest of 1 orange
  3. • 4 tsp. Dijon mustard
  4. • 2 cloves garlic, minced
  5. • ¼ c. apple cider vinegar
  6. • 1 heaping TB grated fresh ginger
  7. • 3 TB low sodium soy sauce or tamari
  8. • ½ tsp. chili flakes
  9. • ¼ c. grapeseed oil
Instructions
  1. Season fish well with salt and pepper. Heat a good drizzle of oil in a large saute pan. When it is very hot, add fish and cook for about 40 seconds on each side (for medium rare), or 1 minute on each side (for medium).
  2. Make dressing: Whisk all ingredients except oil in a large bowl. While whisking vigoursly, gradually drizzle in oil. Season with salt and pepper if desired.
  3. Toss dressing with chilled soba noodles, fresh vegetables, cilantro and most of the sesame seeds. Cover and chill for at least 20 minutes (or as long as two days).
  4. To serve: Top with sliced seared fish and sprinkle with remaining toasted sesame seeds.
Notes
  1. If you can't get Albacore, try Yellowfin tuna or Yellowtail. Or heck sub grilled chicken!
  2. The salad is so yummy and filling, you can eat it alone, serve it over a bed of greens, or add it to a wrap. I have made it for my vegetarian friends and topped it with sauteed tamari marinated tofu.
  3. To give it a Thai style flare, use chopped roasted peanuts, fresh basil and mint and a splash of fish sauce.
The Flavor Conspiracy https://flavorconspiracy.com/

My Favorite Agua Fresca Elixirs


Drink More Water, Detoxify Your Body, Take More Vitamin C, Stay Hydrated, Get Those Greens and Reds!

Sound familiar? I don’t know about you, but those have all been on my “to-do list” for my wellness plan and health vision boards at some time or another.  The thing is, that like so many others, I get all excited with awesome intensions, start drinking a ton of water, eating all of those healthy fruits and veggies, creating healthy habits….and then…I’m not sure what happens ( in the background that horrible horn from the game show plays when someone has just lost…whaw, whaww), and there I am fizzled out. I’m looking in the mirror at my skin, wondering why it isn’t looking so good, asking myself why I didn’t drink any water today, and starting another “to-do list” in the hopes of somehow getting remotivated to get back on track.

collage agua frescasI Got The Fever For The Flavor!

If you love the flavor of plain old water, well, good for you. I make myself drink it, but sometimes I just need something more.  I want something refreshing, flavorful, maybe slightly sweet…but I don’t want something full of refined sugar and all sorts of unnatural ingredients. When I am creating a menu, I want to include some sort of drink that sparks people’s taste buds and gets them ready for the meal they are just about to enjoy.  I want to indulge in a beverage that very well could be turned into an evil cocktail, but can be enjoyed sans booze and that even has some health benefits. And, I don’t always want a thick smoothie. This is where my favorite “agua fresca” elixirs come in. Inspired by the fruit “agua fresca” of Mexico (meaning fresh water), yet revamped so they contain a lot less sugar and most of the time a lot more of the beneficial and herbal ingredients that are super good for us.  Finally herbs that were previously just used on plates as garnish, are getting their time in the spotlight for the amazing contribution they make to tummy, skin and immune health…like parsley and mint.

 tea collage
 
So, today I share with you three of my favorite elixirs that make my mouth and body very happy, served over ice, occasionally combined with my favorite champagne or sparkling water (or lets face it..vodka or rum)… or just on their own.  The first one has been known in my circle of friends and clients as Zhee Zhee’s Crazy Green Drink, next is Watermelon Lime Refresher and the third is a super simple Lemon Grass Almost Iced Tea.

Trio of Agua Fresca Elixirs
Three refreshing healthful drinks that are sure to quench your thirst.
Write a review
Print
Zhee Zhee's Crazy Green Drink
  1. 1 bunch Italian parsley, rough chopped
  2. 2 c. mint leaves
  3. juice from 2 limes
  4. 1 chunk of ginger root, approx. 2 inch
  5. 2 apples cut in chunks
  6. 1/2 of a European cucumber cut in chunks
  7. optional 4 Tablespoons honey, agave or 100% maple
Watermelon Lime Refresher
  1. 1 seedless watermelon, scooped out
  2. juice from 3-4 limes
  3. handful of mint leaves, torn
  4. 2 limes, sliced thin
  5. handful of berries and sliced oranges
  6. optional 4 Tablespoons agave, honey or 100%maple
Lemongrass Iced Tea
  1. 6 c. lemon grass leaves (the long green part)
  2. zest and juice from 1 lemon
  3. 2 heaping Tablespoons of your favorite loose chamomile*
Zhee Zhee's Crazy Green Drink
  1. Combine ingredients in a bowl. In two batches, puree on high speed in a blender with 4-5 cups of cold water in each batch. Let the blender run until all leaves are pureed and there are no chunks at all. Strain over ice. **This one is super great for detoxing, purification, digestion; and gives you an opportunity to throw in some other stuff like celery and spinach if you have it.**
Watermelon Lime Refresher
  1. Puree watermelon with lime juice in a blender and strain it into a container. Place any pulp back in the blender and puree it with 4 cups of cold water, and optional sweet stuff. Add that unstrained into the container. Toss in the mint, slices of lime, oranges and berries. **This is the one that makes an especially nice watermelon mimosa or watermelon mojito.**
Lemongrass Iced Tea
  1. Combine all in a pot with at least 8-10 cups of water. Bring to a boil, then simmer for 10 minutes. Turn the heat off and let it sit for an hour. Strain into a container and chill over ice. **This one is great for upset tummies, and doubles as a soothing astringent for your face**
Notes
  1. *I usually substitute Envision Tea's "Snuggle" or "Nourish" tea for the chamomile. They are awesome organic teas created by a super tea alchemist friend and can be purchased on the products page of her website: elixifyyourlife.com
  2. *I am type 2 diabetic, so I am used to unsweetened elixirs and appreciate the natural sweetness of herbs and fruits. If you like your drinks a bit sweeter I do suggest trying sugar alternatives such as agave, honey, maple or coconut sugar. They are still adding grams of sugar to your diet, but are lower glycemic and natural/little to no refining.
  3. * On those days when I know I should be drinking more water and really going for the cleanse, mixing a 50/50 ratio of elixir to water makes it so much easier. I can down a couple gallons in a day. It Lowers the sugar intake even more, while making it so much more interesting than just plain water.
  4. * Making these drinks using my recipe is great, but honestly, I want y'all to become more intuitive and add your own twists to them. Look in the fridge and see what you have that could be used- blue berries, tangerines, kiwis, kale, lettuce, or even fresh fennel.
The Flavor Conspiracy https://flavorconspiracy.com/

But Can You Use A Knife?


Must Have Knife Skills!

That’s what it would say on the top of a want ad I would post for a chef, kitchen assistant, home cook or a husband, for that matter. You may have heard this before…the most important tool for a chef, besides your tongue, is a good knife.  If you really want to make some dietary changes and start cooking more at home, or start cooking professionally, you have got to learn how to prepare ingredients quickly and skillfully.  The biggest excuse I hear from people who want to start eating healthier and eating more fresh food at home, is that they don’t have time to cook. This is most likely because they are using a lame knife (most likely dull and way too small), and don’t know the proper way to hold it. Cooking the food really doesn’t take much time; most of the work is prepping the ingredients.

The Smaller You Cut It, The Faster It Cooks!

This is basic common sense…a whole potato will take about an 1 1/2 hours to bake.  However, if you cut it into 1/2- inch cubes, it will cook in less than half the time. So, for me, this translates to my cutting up some potatoes and other root vegetables, tossing them with salt, onions, garlic and a touch of olive oil, then roasting them in a 425 degree oven for 45 minutes. Now I have already roasted roots available for me to use all week in salads, as a breakfast hash, or even make into a pureed soup; taking just minutes to prepare a healthy meal after a busy work day.

What Brand of Knife Should I Buy?

The brand you buy is really a matter of preference for most folks. There are so many really great knives out there that will range between $80 and $1500 per knife. I love my good old classic Wusthof that I have been using for 20 years. It fits nicely in my huge hand, its has a full tang, high-carbon steel, hand forged and the handle is ergonomically fabulous for the long hours of prep that I put into catering and teaching. I often suggest to people that you go to a kitchen accessories store and try holding each knife to see how it fits in your hand, make note of the knife you like the best; and then go online to see if you can find it at a discount. There are many materials to choose from (stainless steel, high-carbon steel, titanium, ceramic). I prefer high-carbon steel because it lasts, keeps an edge nicely, isn’t too expensive and can take a beating.

What Kind of Knife Should I Use?

Please don’t go out and buy a whole set of knives. You may have already discovered, that you end up using one or two knives from that huge set. The rest sit there in the block taking up space.  Most chefs will agree that all you really need to start with is one good chef’s knife, with a blade no shorter than 8 inches. This is the knife we will use for pretty much everything. If you are adding to your tools the next knives that would be helpful would be a serrated slicer and a fileting (or boning) knife. Just make sure you keep your knife sharp by using a steel (no shorter than 12 inches) every single time you use your knife.

Knife Skills 101

I am not going to give you an entire free Knife Skills class right here, because, lets face it, I would rather have you sign up for my next class and learn those skills first hand.  However, I do want to help you out a bit, especially with the items that are most difficult to cut.

One of the hardest things for most people, is dicing onions. They fall apart, they are stinky, they make you cry, etc.  A few things to remember when attacking the onion: make sure your knife is sharp, so that it slices rather than mashing those stinky juices all over the place. Refrigerate the onion so that the juices won’t defuse into the air as easily. Wipe your knife off with a damp towel in between cuts.

Here are the basic steps to dicing an onion. Just remember that the more cuts and closer they are together, the smaller the pieces will be.

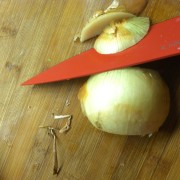
Cut the onion in half from end to end.

Cut the onion in half from end to end.

Cut the ends off

Cut the ends off.

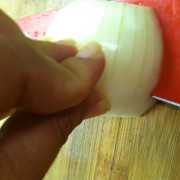
Make parallel cuts from one end toward the other, leaving about 1/4 inch uncut.

Make sure your cutting board is placed at the edge of the counter. Use your fingers on the top of the onion to put pressure, and make parallel cuts from one cut end toward the other, leaving about 1/4 inch uncut.

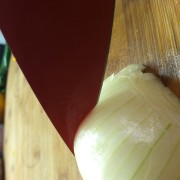
Leaving the 1/4 inch uncut, making perpendicular cuts. The space between your cuts will determine the final size of the dice.

Using the tip of the knife, begin cutting (leaving the 1/4 inch uncut), and dragging the knife through. The space between your cuts will determine the size of the dice you end up with.

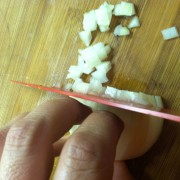
final cuts of the onion

Your hand is in a claw position, with pinky and thumb supporting the food and three guide fingers in front.

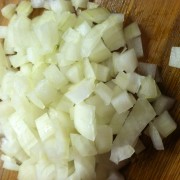
Tada! Diced onions!

Tada! Diced onions!


Mother’s Day Brunch

Honoring The Mamas!

It’s Mama’s May, the month that brings a time for honoring my mama, sisters,  aunts, girlfriends, all of the wonderful women and feminine energy that surrounds me, the people I know who have nurtured and supported me and who give of themselves in a motherly way; whether it be to adults, children or animals.

Where would this world be without them?

Each of us has that someone that represents the essence of mama. If it isn’t your biological mother, maybe it was a family friend or grandmother.  Perhaps a teacher. Maybe it was a father that played the role of both papa and mama. I do not have any human children of my own, but I know that I have loved and nurtured many a humans and animals with all of that motherly energy.

Giving and receiving that nurturing is truly one of life’s special experiences.

Picnic Brunch

Screen Shot 2015-05-03 at 10.00.16 AM

Oh and what better way to show our appreciation for these Mamas in our life than to treat them to a handmade meal, prepared with all of the love and gratitude we can put into it. It doesn’t have to be fancy, or expensive and can include all sorts of Mama’s favorite things

(of course even a few store bought items…bottle of bubbly, fresh fruit and imported cheeses are usually on my list).  One of the fun things I have done in the past, rather than make reservations at a crowded restaurant, was create a Mother’s Day picnic brunch in the park. We can relax and lounge around appreciating the fresh air and each other, and take as much time as we like, laughing and grazing on tasty treats.

This time around two decadent, yet healthy, treats on my menu will be my Dark Chocolate Truffle Squares and fruit salad topped with Zhee Zhee’s Super Nutty Gluten Free Streusel. Both are rich in protein, antioxidants and super nutrients with just the right amount of sweetness.  I will serve all of this with a tasty salad and cheese board, and will also be making my extra special Pineapple Ginger Mimosas.

Quick Bonus Recipe for the Pineapple Ginger Mimosas:

Combine 1 quart of pineapple juice with 2 TB of freshly grated ginger and a pinch of cinnamon, in a sauce pot.  Simmer uncovered until the juice is reduced by half, then chill. Serve 2 tablespoons of the juice mixture in each champagne glass, topped with champagne and garnished with a bit of fresh pineapple.

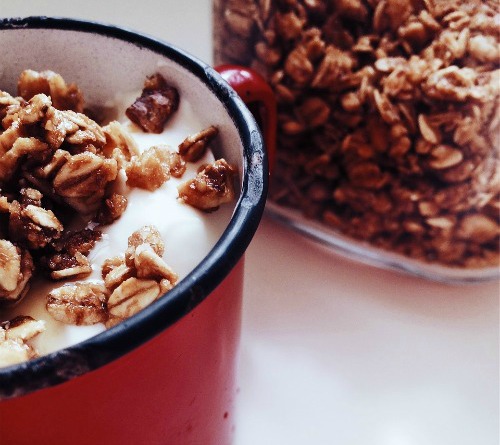
Super Nutty Gluten Free Streusel (almost granola)
Yields 2
Write a review
Print
Prep Time
5 min
Cook Time
20 min
Total Time
25 min
Prep Time
5 min
Cook Time
20 min
Total Time
25 min
Ingredients
  1. ½ c. almond meal
  2. 1 c. gluten free rolled oats
  3. 1 c. chopped walnuts
  4. 1 TB grated fresh ginger
  5. 1 TB grated fresh orange zest
  6. 3 TB coconut sugar
  7. 1 tsp. ground cinnamon
  8. 1 TB molasses
  9. A couple pinches of kosher salt
  10. 4 TB unrefined coconut oil
Instructions
  1. Combine all of the ingredients in a bowl. Then spread out on a sheet pan. Roast in the oven until all is golden and toasted and crunchy, 425 degrees, approximately 15 minutes. *Stir about halfway through, spread mixture out again and continue baking.*
  2. Serve on top of a big bowl of your favorite fruit or berries, with some non-fat Greek yogurt. –OR- layer with fruit and yogurt in martini glasses, like a parfait.
The Flavor Conspiracy https://flavorconspiracy.com/
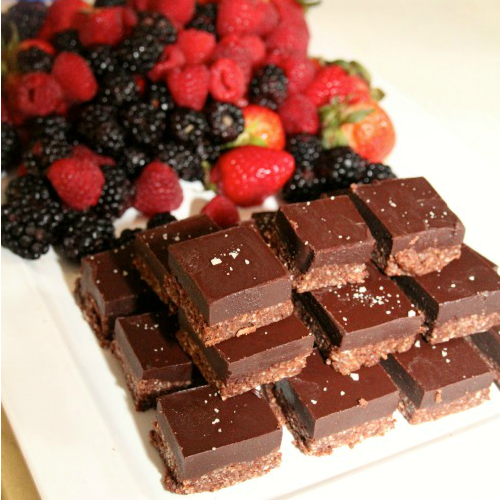
Decadent Gluten Free, Vegan, Dark Chocolate Truffle Squares
Yields 16
Write a review
Print
Prep Time
15 min
Prep Time
15 min
Crust
  1. 1 c. almond meal
  2. ¼ c. finely shredded unsweetened coconut
  3. 4 TB coconut oil, melted
  4. 2 TB unsweetened cocoa powder
  5. 3 TB maple syrup
  6. Pinch of sea salt
Filling
  1. 5 oz. 100% cocoa bar, chopped
  2. 2 TB unsweetened cocoa powder
  3. 3 TB coconut oil
  4. 1 TB honey (kind of to taste)
  5. 3 TB pure maple syrup
  6. ½ c. finely minced unsweetened dried fruit
  7. Good quality sea salt
Instructions
  1. Line a small baking dish, loaf pan or cake pan, with plastic wrap all the way up the sides.
  2. Heat 4 TB coconut oil in a small pan just until melted. Pour it into a bowl with the almond meal, a pinch of salt, coconut, 3 TB of the maple syrup and 2 TB of unsweetened cocoa powder. Combine with a fork and then press it into the bottom of the plastic wrap lined pan.
  3. Melt 3 TB coconut oil, turn the heat off, and stir in the 5 oz. chopped 100% cocoa bar. When it begins to melt, turn the heat on again, just until it is steaming and hot, then turn the heat off again. Stir in honey, remaining maple syrup and cocoa powder, then add minced dried fruit. Spread this mixture over the crust. Chill until it is solid, about an hour. Remove from pan, by lifting the plastic wrap, cut into small squares and garnish with crystals of salt. **these are super rich and decadent, so the pieces should really be about 1x1 inch.**
The Flavor Conspiracy https://flavorconspiracy.com/

Nostalgia Retro Cocktail Party

Happy Days Are Here Again!

zhee retro recipeSo I am in my early forties and finding myself feeling nostalgic and reminiscing with my friends (many of which have been with me since elementary school) much more often these days. I mean isn’t that what we do at this age – talk about “back in the day” and laugh together till wee hours in the night?

The other night we were reminiscing about one of my favorite TV shows from “back in the day”, Happy Days. For those of you too young to have seen it, it was a family comedy that took place in the 50’s with great music and teenage romance and all that good stuff.  This got me to scheming about my next themed party.  

My people are always game for a party that involves yummy food and drink, but especially one that involves dressing in costume. So, I am getting motivated to plan a Nostalgia Retro Cocktail Party, including all of the retro cocktails, 50’s dress up and music, followed by outdoor all night viewing of the DVD set of Happy Days episodes.

cocktail partyThe cuisine from the 50’s wasn’t exactly health conscious, and so much of it included oddly shaped and formed bits of convenience meats and cheeses.  This was the time, mind you, when TV dinners, spam and processed cheese “food” were running rampant in the kitchens of house wives all over America. Meat loaf, deviled eggs, tater tots, molded jello desserts and cheese logs were on the menu for most dinner parties.  
So, I am going to do my best to honor these time tested menu items at my party.  But of course, in true Flavor Conspiracy style, I will be creating slightly more healthful versions of the classics; using fresh natural ingredients and sneaking in more of my favorite super foods.

On the menu:

  • Coconut Mango Jello Shots – From scratch, using fresh fruit, lite coconut milk and coconut sugar in place of refined white sugar.
  • Deviled Eggs – chock full of minced homemade pickles, swap in Greek yogurt in place of mayo, topped with crispy prosciutto and chives
  • Tater Tots – with added cauliflower and parsnip in the mix
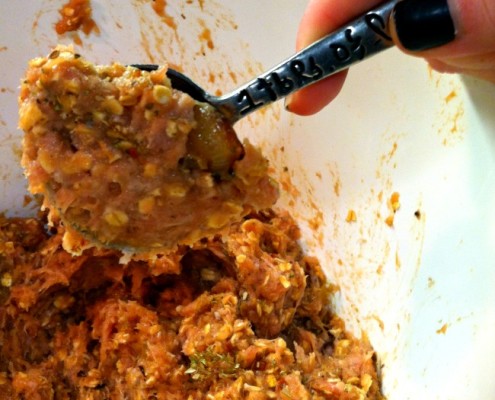
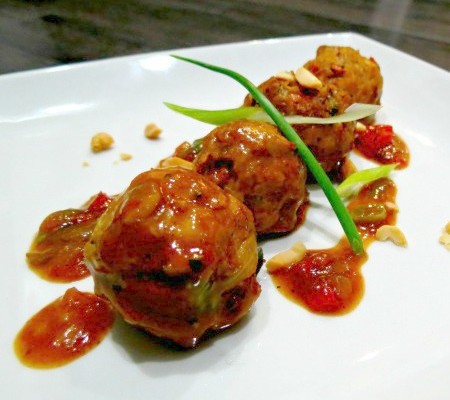
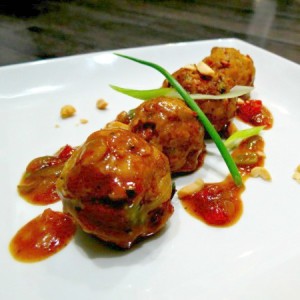
  • Mini Meatloaves – my turkey meatballs with tons of veggies, fresh herbs and oats instead of bread crumbs
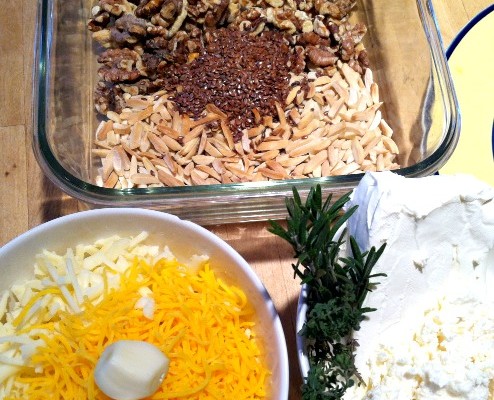
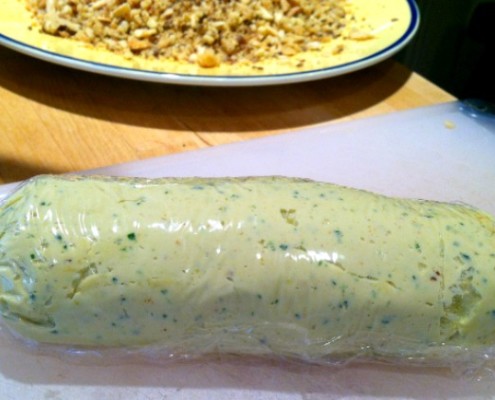
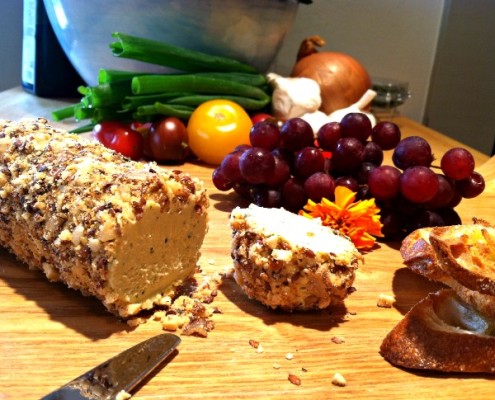
  • Cheese Logs – swapped out the processed cheese product and use low-fat cream cheese with sharp cheddar, feta and a toasted nut and flax seed crust

I can’t wait to get this party started!!! So I have already started playing around with my recipes.  Below are two that I will share as a teaser.  After I have the party, I will post pics of the final shindig.
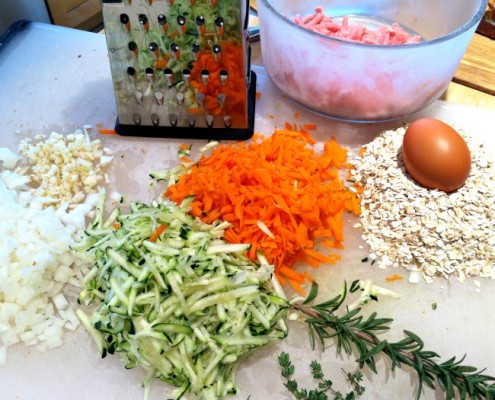
Zhee Zhee’s Turkey Meatballs (a.k.a. Mini Meatloaves)
Yields 30
Mini Meatloaves with tons of veggies, fresh herbs and oats instead of bread crumbs.
Write a review
Print
Prep Time
15 min
Cook Time
15 min
Total Time
30 min
Prep Time
15 min
Cook Time
15 min
Total Time
30 min
Ingredients
  1. 1 pound ground turkey
  2. 3 cloves garlic, minced
  3. 1 c. small diced onion
  4. 1 c. each grated zucchini and carrot
  5. 1 c. rolled oats
  6. 1 egg white
  7. 1 TB each tamari, balsamic, Worcestershire sauce
  8. 1 tsp. kosher salt
  9. 1 tsp. dried oregano
  10. 2 tsp. each minced fresh oregano and thyme
  11. Chili flakes
Instructions
  1. Meatballs - In a sauté pan, caramelize onions and carrots, then stir in zucchini and garlic. Cook for 1 more minute, and transfer to a bowl with remaining ingredients.
  2. Form mixture into balls (about 1 TB each). Place them on a sheet pan lined with greased foil, about an inch apart. Bake at 425 degrees until browned…15 minutes. If you are making mini meat loaves, divide mixture into greased muffin tin and bake for 20-25 minutes.
  3. To serve - Ladle some of your favorite warm marinara on the bottom of the platter, then place the meatballs down and sprinkle with scallions (and it may sound strange, but I love to also sprinkle with chopped cashews or pine nuts).
Notes
  1. I sometimes just make a very quick fresh tomato sauce: Sauté 1 c. onion and 3 cloves garlic in 2 TB olive oil, until very caramelized (about 6 minutes). Stir in ¼ c. red wine and 1 TB balsamic with 1 tsp. kosher salt and ½ tsp. chili flakes. When liquid is almost evaporated add 3 cups diced roma tomatoes and cook until the tomatoes start to melt. Puree in a blender with a couple pinches of dry basil and a couple of fresh basil leaves.
The Flavor Conspiracy https://flavorconspiracy.com/


Retro Cheese Log Makeover
Yields 2
I'm swapping out the processed cheese product and use low-fat cream cheese with sharp cheddar, feta and a toasted nut and flax seed crust.
Write a review
Print
Prep Time
15 min
Cook Time
20 min
Total Time
35 min
Prep Time
15 min
Cook Time
20 min
Total Time
35 min
Ingredients
  1. 8 oz. Neufchatel (1/3 less fat cream cheese)
  2. 4 oz. feta cheese
  3. 8 oz. shredded sharp cheddar
  4. 1 TB plain nonfat yogurt
  5. 1 tsp. fresh thyme leaves
  6. 4 TB fresh Italian parsley leaves
  7. 2 cloves garlic
  8. 1 TB Worcestershire sauce
  9. 1 tsp. kosher salt
Coating Ingredients
  1. 1/2 c. walnut pieces, toasted
  2. 1/2 c. almond slivers, toasted
  3. 3 TB flax seeds
  4. 1 TB minced rosemary
  5. 1 tsp. each kosher salt, black pepper and smoked paprika
Instructions
  1. Place coating ingredients in a food processor, and pulse until the nuts are very finely chopped. Transfer to a large plate and set aside.
  2. Add thyme, parsley, cheddar and garlic to the food processor. Process until it is all finely combined. Add remaining ingredients, except for the coating. Turn the machine back on and let it puree until everything is totally smooth.
  3. Divide the cheese mixture evenly between two pieces of plastic wrap (about 12”x 12”)…form the cheese mixture into logs, approximately 7 inches long and maybe 2 inches in diameter. Use the plastic wrap to form the logs evenly and twist the wrap on the ends. Chill it for 20 minutes in the fridge.
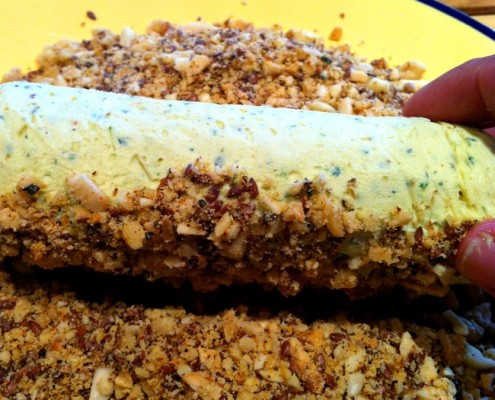
  4. Carefully unwrap the cheese logs and roll each one in the coating, so that they have an even layer of toasted nuts and seeds. Make sure to press the nuts into the logs, so that the layer is quite thick, as well. Serve on a platter with crackers or crostini.
Notes
  1. Alternative, which I almost prefer, is to form the cheese mixture into individual truffle sized balls, then chill and coat with nuts. You can serve individual cheese balls on a small bed of arugula salad with bread sticks or elongated crouton of rustic bread.
The Flavor Conspiracy https://flavorconspiracy.com/


Non-Pizza Pizza

Welcome to Zhee Zhee’s non-pizza pizzeria!

It’s non-pizza because I don’t follow any traditional pizza making process, I don’t let the dough rise but for a couple minutes, I don’t make it in a round pizza shape.

RECIPE INCLUDED BELOW.

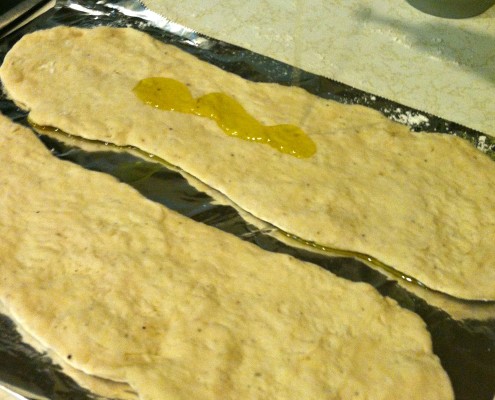
What I do is throw together a quick yeast dough (recipe to follow) and stretch it into individual sized long oval type shapes. I top it with whatever the heck I want to. The cheese I use will just be whatever I feel like, generally it won’t be anything like the typical mozzarella, ricotta or parmesan. I love those cheeses and use them for all sorts of stuff…but being the multi-cultural girl with a love for variety you will rarely find me following the classics. So I highly suggest you stray from the classics, as well.

Hey live life on the edge and stop shopping for recipes. Instead use a recipe as a general idea and guideline for technique. Other than that make use of what you have, what’s in season, what you found on sale, etc.

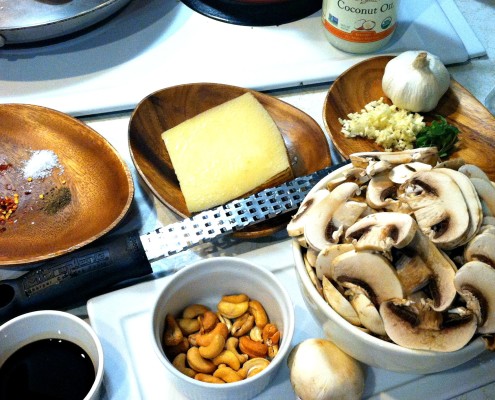
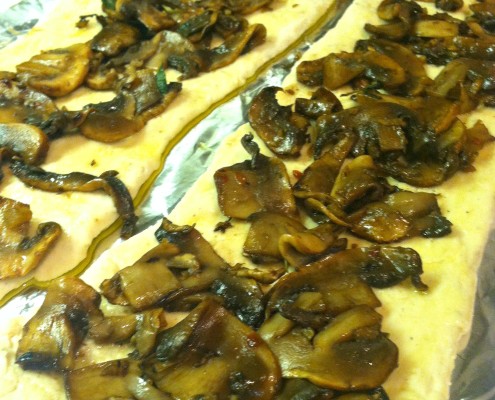
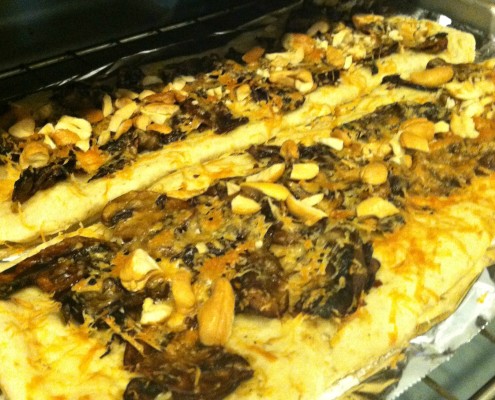
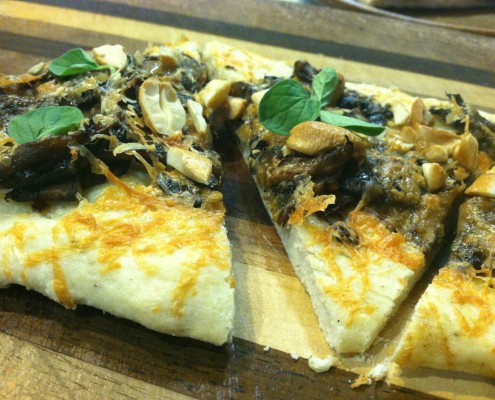
Any vegetables or bits of meat can be sautéed with some minced garlic in some coconut oil or olive oil for a few minutes; then tossed with a splash of vinegar and some fresh herbs. This time around I had some mushrooms and fresh oregano. The cheese that was in my fridge was some yummy nutty Spanish Manchego.

In the photos and recipe below, I show you the ingredients I prepped and laid out to make it really easy for me to assemble this funky quick non-pizza, plus I share with you just how I did it.

Non-Pizza Pizza
Write a review
Print
Ingredients
  1. 1 lb. mushrooms, sliced thin
  2. 2 cloves garlic, minced
  3. About 2 TB fresh oregano leaves
  4. ½ tsp. each chili flakes, black pepper, cayenne and kosher salt
  5. 2 tsp. each tamari and balsamic vinegar
  6. Handful of roasted cashews- Yes, that’s right I put nuts on pretty much everything!
  7. Handful of Manchego cheese
  8. Heaping tsp. organic coconut oil
  9. 1 batch of pizza dough
Instructions
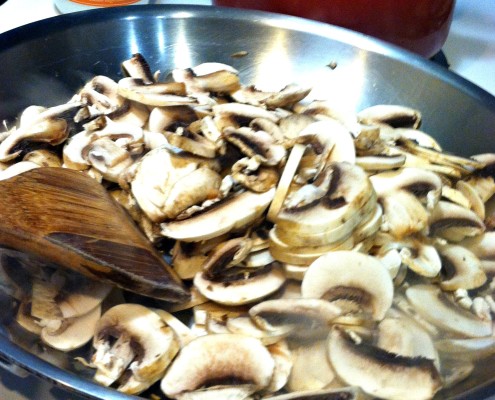
  1. I heated a large sauté pan and tossed in the coconut oil. When that was melted and the pan began to smoke, I added the mushrooms with the salt and pepper variety. I sautéed them on high heat until the mushroom juices emerged and then began to evaporate again.
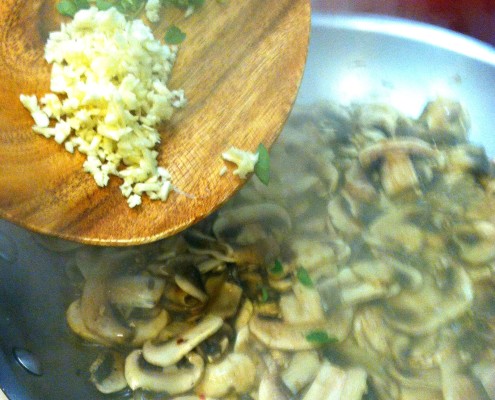
  2. Next the garlic and fresh oregano went in. I didn’t bother chopping the oregano, just tore it with my hands. Kept cooking until the juices totally evaporated and the mushrooms started to get kinda sticky to the pan and brown.
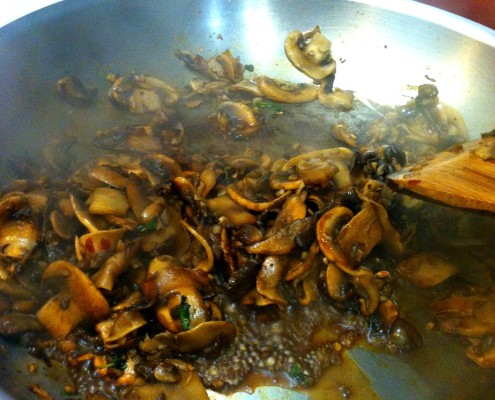
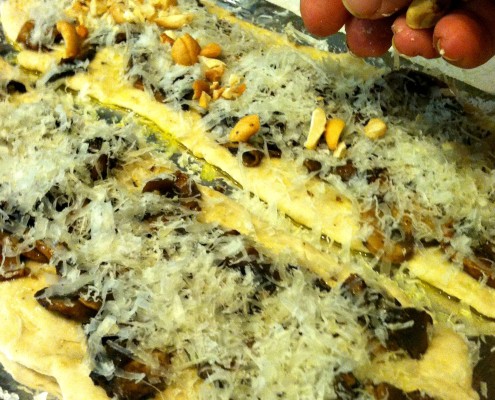
  3. In went the tamari and balsamic…and tada! It’s ready to be a pizza topping! I grated the Manchego using one of my favorite tools of all time…the Microplane. It is this wonderfully sharp (as in careful cause you don’t know pain until you have grated your knuckles with one of these suckers) and it grates stuff to a fine delicate fluffy shred. **Look for my list of “gotta haves” for details coming to the blog bit soon.
  4. Stretch the dough out into thin weird little ovals. Drizzle and rub with olive oil. Spread with some of the mushroom mixture and then top with cheese and roughly chopped roasted cashews.
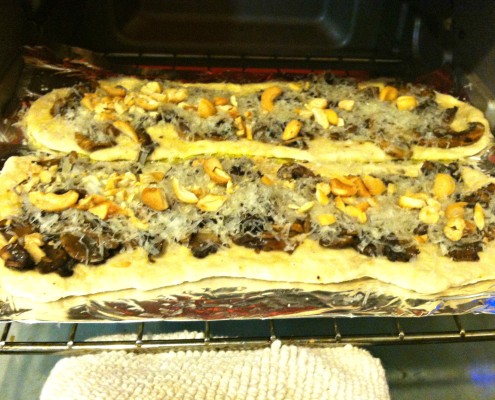
  5. Another totally non-traditional technique I love to use for my little non-pizzas is foil. It is thin enough that you can get a good crispy edge and you can shape it however you want to. Especially since…yep you betcha, I am baking these little guys in a toaster oven. Don’t even get me started about how much I love my toaster oven…all the glory of a convection oven, without heating the whole house. Its big enough to cook 3 to 6 portions of pretty much anything (roasted chicken, veggies, brownies, lasagna). Crap, I wasn’t going to get started on that, was I? Oh well. A good sized toaster oven is the bomb, and let’s just leave it at that.
  6. High temp for me is better, faster, and crispier. Just make sure your dough was stretched thinly. 425-450 degrees is my temp of choice for most things. Um, mine cooked in about 15 minutes.
  7. And voila, there you have my Mushroom and Manchego Pizza with Cashews and Fresh Oregano…but it’s not pizza, but it is, but not really. Who really gives a crap, it’s delicious!
Notes
  1. BONUS - Bonus: My super quick pizza dough recipe that I use for flatbread, pizza and let it rise an extra hour for focaccia. In one big bowl combine 2 c. flour, 1 tsp. salt, ½ tsp. pepper. In a little bowl on the side combine 2 ¼ tsp. yeast, 1 tsp. sugar and ½ c. very warm water. Let the water and yeast sit for a few minutes, then add 2 TB olive oil and combine both bowls. Mix it together and add a bit more water or flour if needed. Knead the dough for a minute. Then cover with a damp towel and let the dough rise for just 15 minutes in a warm area. It is now ready for you to use however you want to. Just remember that when rolling or stretching, it helps to have a little flour on the side to keep your hands from getting sticky.
The Flavor Conspiracy https://flavorconspiracy.com/


Pop-Up Cooking School in San Diego

Zhee Zhee’s Pop-Up Cooking School is a new addition to my offerings.

(Next Pop-Up Cooking School is March 29th at Liberty Station.)

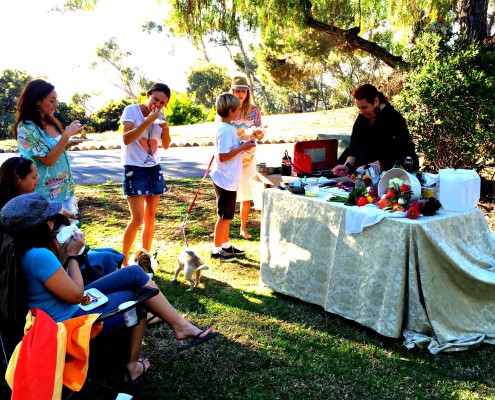
I love this gorgeous city of ours and really love spending time in many of our outdoor parks.  Cooking outside and feeding people are two of my favorite things ever!  So I had the idea of packing up my camp stove and holding demonstration style cooking classes out in the open. Each time holding these classes in a park or beach (or hey someone’s awesome back yard??).  It gets local food enthusiasts learning, exploring and sharing…while they dine on a freshly made four- course meal. 

My way of summing it up is: “You bring an empty stomach, a chair, picnic blanket and a willingness to learn in an unconventional classroom. And I bring the food prepared with laughter and love!”

The first session, in January, was fun…but uh, a little interesting. 

Set in the picturesque Arbor area of Presidio Park, birds singing, weather is perfect, and I have all sorts of beautiful organic produce from Napoli Farms. As a traveling chef I have to be open to crazy last minute changes to the original plan. Some of the laughter and love, must be applied to situation when things don’t quite work out as planned.  That time it was having my camp stove die right in the middle of cooking the very first dish.  Yep, we had plenty of fuel, but the stove decided it was done and retiring; even though it was fully functioning the night before.

How was I supposed to do a cooking demonstration with no stove to cook on??  Lucky thing was some friends of mine were class participants, and they only lived a few minutes away in Mission Hills. They offered up their kitchen and dining room for us to hold the class. Talk about a literal, “pop-up” cooking school.

10849889_761328343932242_1761016212719349402_n

So we all packed and gathered the food and pots and pans, etc…caravaned over to their place. Someone stopped to pick up a couple bottles of wine and sparkling water. And so flexibility and open mindedness ensured we had a great class, with plenty of tasting and learning; oh and yes lots of laughter and love!

Ah…  The second session, in February was fantastic.  I held it in the same original location of Presidio Park, but this time had two working camp stoves, thank you very much!! We were once again, blessed with perfect weather. There was a great group of enthusiastic and fun food lovers that chowed down on a menu of healthy, fresh dishes of my own creation.

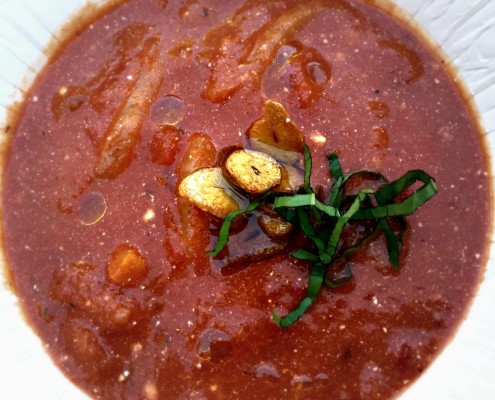
Including: Spicy Shrimp with Roasted Pepper Kalamata Relish and Feta Sauce, Asparagus and Arugula Salad with Parmesan Citrus Dressing, Smoky Tomato and Fennel Soup with Crispy Garlic and Thai Basil, Seared Local Halibut with Super Greens White Bean Ragout and Walnut Gremolata.

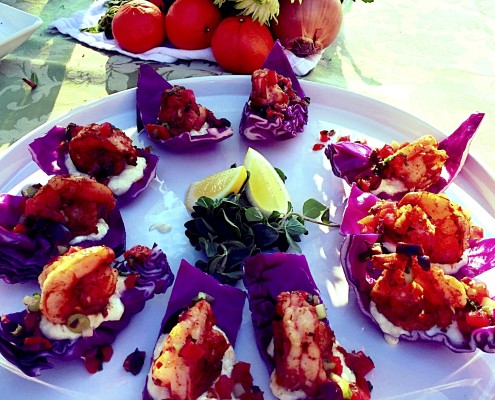
This month’s recipe I am sharing with you is for that oh so delicious Spicy Shrimp with Roasted Pepper Kalamata Relish and Feta Sauce.  It is served on pieces of red cabbage in the picture.  However, you can serve it on a fried plantain, a tortilla chip, a grilled piece of bread or on top of a bed of greens as a composed salad. I was thinking these would make a kick ass shrimp taco, too.  I purchased some huge baja white shrimp from Catalina Offshore, and they were just gorgeous and juicy and tender.

So that is the tale of the two sessions of Pop Up Cooking School so far, and I’m planning on having one every month! You can sign up by going to my “events” page on the website, and clicking on the link to purchase tickets.

Spicy Shrimp with Roasted Pepper Kalamata Olive Relish and Feta Sauce
Write a review
Print
Ingredients
  1. 1 head of red cabbage
  2. 1 pound 21/25 shrimp, peeled and deveined
  3. 4 cloves garlic, minced to a paste
  4. 1 tsp. kosher salt
  5. ½ tsp. each cayenne pepper, pasilla chili powder and crushed red pepper flakes
  6. Drizzle of olive oil
  7. 1 TB coconut oil
  8. ½ c. minced onion
  9. 2 TB minced fresh oregano
Ingredients for Relish
  1. 1 roma tomato, brunoised
  2. ½ c. pitted Kalamata olives, chopped
  3. 1 red bell pepper
  4. Juice from ½ a lemon
  5. 1 TB extra virgin olive oil
  6. ½ c. brunoised celery
  7. 1 scallion, thinly sliced
Ingredients for Feta Sauce
  1. 1 clove garlic, minced to a paste
  2. 2 TB extra virgin olive oil
  3. ½ crumbled feta
  4. 2 TB lemon juice
  5. 1 c. plain Greek yogurt
  6. Pinch of salt and pepper
Instructions
  1. Remove the tales from the shrimp. Using a pairing knife, cut a slit up the back the almost goes all the way through. This gives the shrimp and extreme butterfly cut, which makes it absorb more of any flavor we are trying to impart. Toss the shrimp with the olive oil, garlic, onion, oregano and dry spices.
  2. Heat a very large skillet with coconut oil. Using tongs or a gloved hand, place the shrimp cut side down and sprinkle with salt. Allow it to cook for a minute, before flipping the shrimp to its sides to cook just until it is opaque.
  3. For sauce: Mash the feta with the garlic and olive oil until it is quite smooth. Then stir in lemon and yogurt, and a pinch of salt and pepper. For relish: Either on a grill or over an open flame on your stove top, fire roast the bell pepper until the skin is mostly black. Place it in a bag or a closeable container and let it sweat for at least five minutes. Using a spoon and a pile of paper towels, scrape the skin off. Discard the blackened bits and paper towels. Julienne and then finely dice. Toss with remaining ingredients.
  4. To serve: Cut cabbage in half, then cut each half in fourths, creating wedges. Peel layers of cabbage wedges, which will now make a little “cabbage chip”. Start with a dollop of sauce, a shrimp then a sprinkle of relish.
The Flavor Conspiracy https://flavorconspiracy.com/

Decadent and Healthy Deliciousness

I hadn’t hung out with my pal, Lance, in a million years; so when he was going to come over to my pet sitting place for dinner I got excited!  He told me he needed something that was delicious and healthy.

Wow, my specialty –  high fiber, less empty carbs, healthy oils, fresh, only natural sugars.

MENU


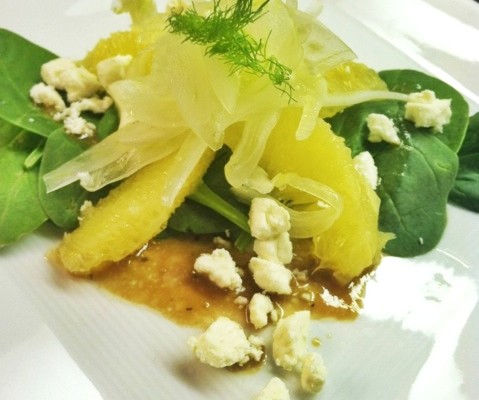
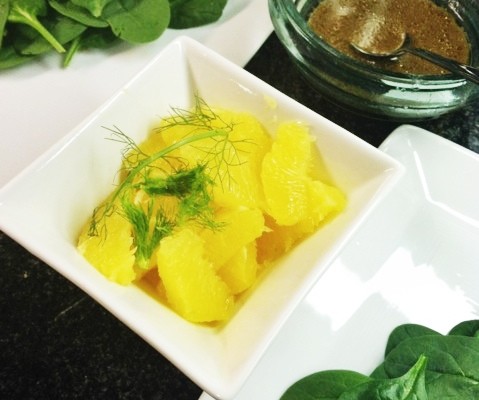
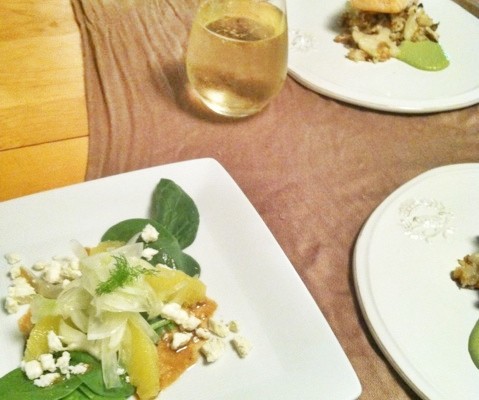
  • Fennel and Orange Salad with Feta and Organic Bebe Spinach
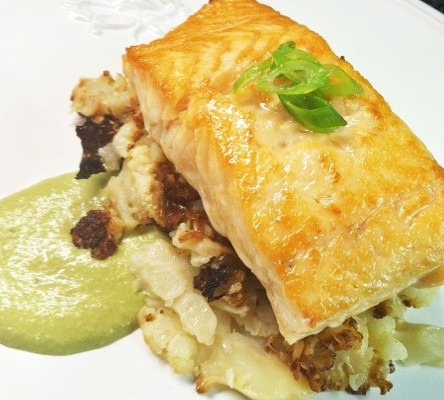
  • Seared Salmon with Roasted Cauliflower and Scallion Sauce
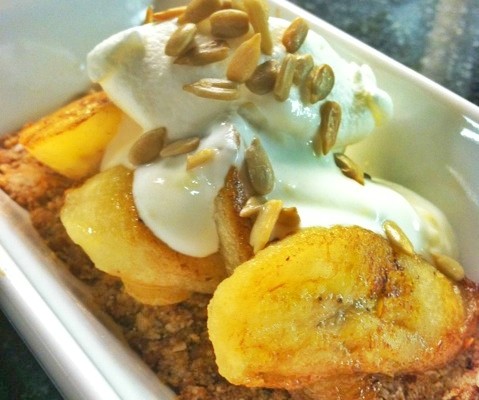
  • Caramelized Bananas w Greek Yogurt, Sunflower Seeds and Honey Almond Crust


Salad

Fennel and Orange Salad w/Feta and Organic Bebe Spinach

Fresh and simple, juicy, light, uncomplicated.

  • Slice (almost shave) a half of a bulb of fennel. Place the shaved fennel in ice water for at least 30 minutes.
  • Arrange baby spinach leaves on a plate and top with orange segments, chilled fennel shavings, feta.
  • Dressing is super simple. Whisk together the juice of half an orange with 1 TB Dijon, 2 TB balsamic, 2 TB olive oil with salt and pepper.
  • Drizzle dressing on the salad. Voila!
Entree

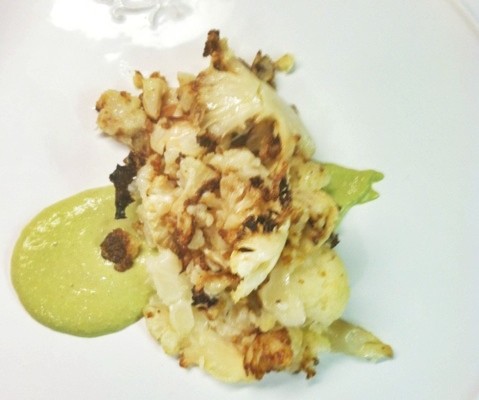
Seared Salmon w/ Roasted Cauliflower and Scallion Sauce


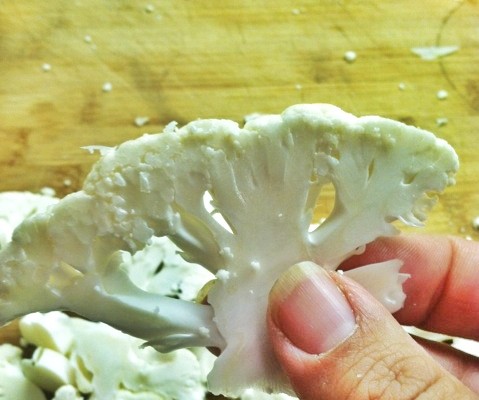
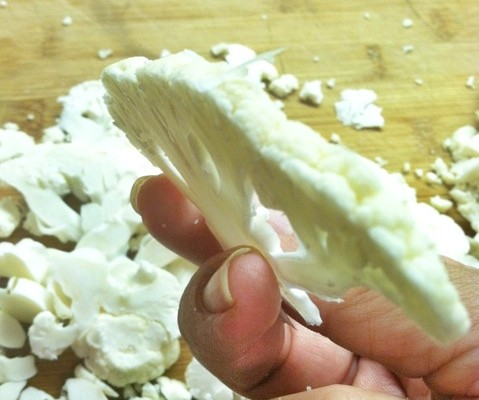
  • Cut cauliflower head in half. Pro Tip: Slice it thinly across until you get pieces like this. Believe me, you get the most yummy roasty browned cauliflower…instead of the chunks most folks end up with.
  • Toss the cauliflower with olive oil, salt and 3 cloves of thinly sliced garlic. Spread in a large pan, then roast at 425 degrees for 15 minutes. Flip all of the pieces over and roast again until brown and caramelized.
  • Scallion Sauce: Slice 6 scallions, sauté them for a few minutes with one clove of minced garlic in a small amount of olive oil. Puree in a blender with salt, juice from one lemon, 1 TB soy sauce, 2 TB sesame tahini and about 1/4 c. water.
  • Key to the perfect seared salmon (I learned from my husband, JC Esquivel, who is the master sauté guy). Get your pan super hot, then add oil, then place a piece of salted salmon filet down. Don’t touch it!!! Let it cook until that first side is golden crispy. Then flip it over and transfer it to the oven. Cook it for maybe five more minutes in the oven- it should still be a bit squishy inside.
  • Artfully smear sauce on a plate, top with a pile of roasted cauliflower. Lay that salmon on the cauliflower and top with a few bits of scallions— the garnish applies to the dish and is edible (rule of thumb with garnish).
Dessert

Caramelized Bananas w/ Greek Yogurt, Sunflower Seeds, Honey Almond Crust

Yummy dessert is super low in any refined sugar and gluten free to boot!

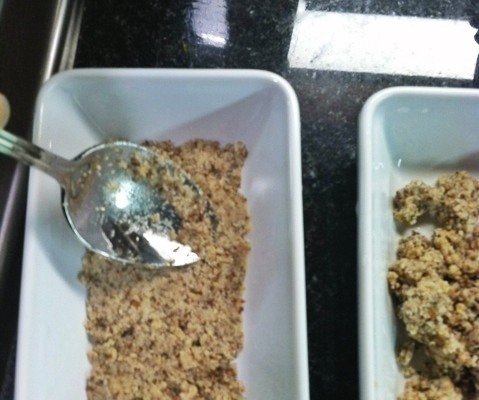
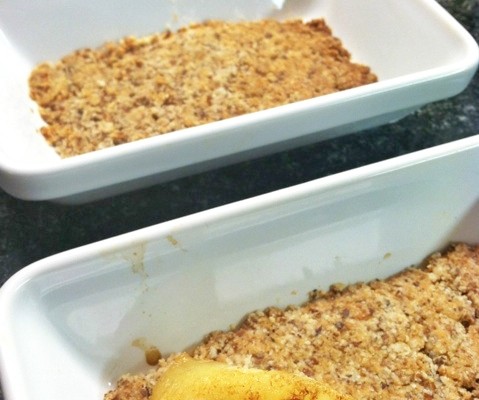
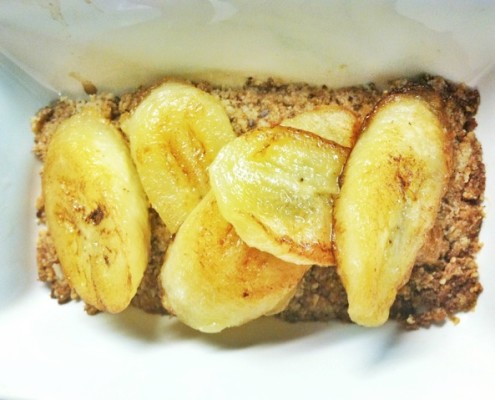
  • The crust: Mix 4 TB of almond meal with 1 TB coconut oil and 1 TB honey- oh and a pinch of sea salt. Spread into two tiny adorable baking dishes. Bake at 425, about 7 minutes and 13 seconds, or until golden.
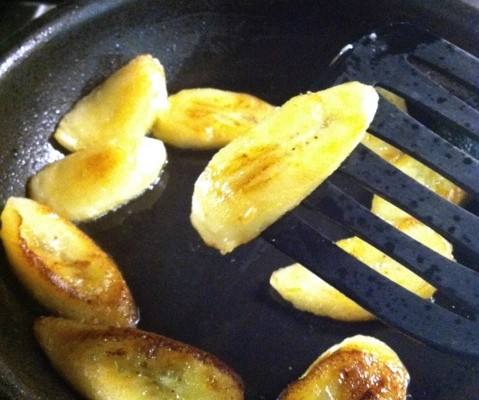
  • The bananas: Slice a banana into biased 1/4 inch thick slices. Heat a dab of Earth Balance or real butter in a small sauté pan. When it is sizzling lay the slices down, and just like the fish, don’t touch them! Let them cook on one side until caramelized, then flip’em and let the next side cook. Lay slices down on the crust.
  • It smells so buttery and sweet…and there is no added sugar on the bananas..just naturally sweet goodness!
  • Add Greek yogurt all melty on bananas.  This yogurt just happened to have pineapple in it.
  • Sprinkle sunflower seeds because a smidgeon of salty is so divine.


Porkapalooza: Supper Club with Friends

Sorry to brag, but so much of who I am as a director of delicious indulgence and a creative culinary artist has to do with an incredible group of supportive friends and family. They are ever willing to taste, explore and share my culinary adventures.

I was so lucky last Saturday to be able to cook for two of my long time friends, Idalia Frazier and Colt Belmonte, who were visiting from Homer, Alaska; where they are chefs and restaurateurs. And my other beautiful friends, Dave and Becca Berggren offered their kitchen for me to play in.

The menu had to be delicious, but needed to be Atkins friendly…yes most chefs would cringe..but I love a challenge!

MENU

  • Zucchini Wrapped Feta
  • Gremolata Crusted Pork Tenderloin Roulade with Kale and Parmesan
  • Salad of Roasted Cauliflower and Green Beans with Spicy Shrimp & Sunflower Seed Vinaigrette
  • Spaghetti Squash Carbonara

1476300_574250055973406_1388060159_n 

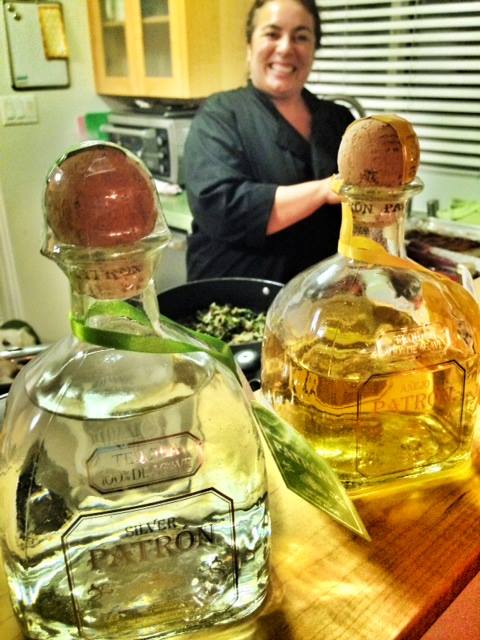
Okay, so we started off with some good quality tequila, splash of sparkling water and a good amount of fresh squeezed lime over ice….low carb, refreshing and gets the giggles flowing:)
Appetizer

Zucchini Wrapped Feta Appetizer

  • Mix some sliced scallions, cracked black pepper and feta cheese with a fork. Set it aside.
  • Cut a zucchini into thin strips, lengthwise with a large sharp knife.
  • Roast those strips drizzled with a pinch of salt and some olive oil on a sheet pan at 400 degrees…just until flexible.
  • Carefully place a pile of scallion feta mixture on one end and roll those babies up.

Be careful!  These are so delicious that they might disappeared before they can be plated (and photographed). Just sayin’. Woops.

Main

Gremolata Crusted Pork Tenderloin Roulade, Kale, Parmesan

  • Next on the prep list is getting the pork tenderloin, butterflied, covered with plastic wrap and then pounded with a sauté pan until it is about 1/4-1/2 inch thick. Saute pans are my tool of choice because you get more even coverage without tearing the meat. Look at that meat beating action! The roulade sounds fancy, but it is super easy as long you get the meat pounded thin enough and you have some tootpicks or twine ready on the side for keeping it together as it cooks.
  • It will then get seasoned with salt and pepper and Gremolata and rest while you prepare the filling for the roulade.
  • For the filling, a whole bunch of kale was cleaned, big stems removed and then rough chopped. I sautéed it for just 5 minutes with olive oil and a few cloves of garlic. A few fat pinches of salt and pepper went in then a big handful of shredded parmesan.
  • Turn the heat off, let the cheese kinda stick to the warm kale and get ready to stuff the pork tenderloin.
  • Take about a cup of filling and pack it down the bottom of the piece of pork. Then tuck and roll tightly. Secure with toothpicks along the seam (kind of like sewing).
  • Rub the whole outside with Gremolata. The recipe for Gremolata: 1 bunch finely minced parsley, 4 cloves minced garlic, I also added 3 TB fresh thyme and the minced zest of 2 or 3 lemons. It smells divine and really gives a bright and herbatious flavor to the meat.
  • Sear those babies in a hot pan with a little olive oil until browned.
  • Transfer them to a sheet pan (I used the same one that I cooked the bacon on and didn’t get rid of the grease!!! OMG extra porky delight! Save the sauté pan cause it is full of fond (tasty bits from the meat browning).
  • In the oven they go….400 degrees for about 30 minutes. I cook my pork until it is medium and still a bit pink in the center so it is tender and juicy. I don’t want to serve my guests pork jerky!
  • I pulled them out and let them rest, tented with foil for about ten minutes so the crazy boiling juices on the inside would calm down and go settle back into the meat. (While they were still cooking I roasted the cauliflower for the salad and blanched the green beans.)
  • The slicing happened after the pork had a chance to rest…cutting it on the bias gives a beautiful cross section of filling and meat. mmmm

FYI:

I stuffed three pork tenderloins that night. If you are cooking for less people use only one or two, the filling is delicious the next day tossed with a salad or just eaten as a side dish.

Side

Spicy Shrimp, Roasted Cauliflower, Green Beans, Sunflower Vinaigrette

  • Thinly slice a head of cauliflower and roast it on a sheet pan with kosher salt and a drizzle of olive oil and a handful of minced onion until some is charred, most is golden and tender…about 20 minutes at 400 degrees.
  • Marinate a pound of large shrimp (peeled, deveined and tail on) in 3 cloves of minced garlic, 1 tsp. smoked paprika, 1 TB lemon zest, 1 TB lime zest, 1 TB crushed red chili flakes, 1 minced Serrano, 1 tsp. kosher salt and a good drizzle of olive oil.
  • Let them sit for about 30 minutes, then get a super large sauté pan really hot with a little oil and sauté them just until they are pink…do not over cook these beauties!
  • The dressing for the roasted cauliflower and green bean salad…so easy and creamy and nutty! In the blender went juice from two lemons, 3 cloves garlic, 1 cup roasted sunflower seeds, 2 scallions, a tablespoon of soy sauce, some chili flakes, about 1/4 c. olive oil and 2 TB of dijon mustard. While it is pureeing in the blender, add just enough water for it to thin out and become super creamy. oooo la la!!
  • The roasted cauliflower and blanched green beans were tossed in the creamy sunflower seed vinaigrette, fresh cilantro and mint and then surrounded by the spicy marinated shrimp that were sautéed in a super hot pan with a bit of olive oil.
Side

Spaghetti Squash Carbonara

  • Spaghetti squash gets cut in half lengthwise, then seeds scooped out. It goes onto a baking dish face down in two inches of boiling water with a bit of salt. Cover it with foil, pop it into a 400 degree oven and roast it for half an hour. Use a fork to shred out the meat and get it ready to toss with the sauce.
  • I start my carbonara by sautéing 2 sliced scallions and 3 cloves of minced garlic for just a few minutes in a touch of olive oil. Sprinkle in some salt and chili flakes then get ready to add the peas. About a half of a package.
  • I’m not a fan of frozen vegetables, but frozen peas are quite wonderful. I jump on fresh peas when they are available..these particular ones make a really good substitute. Add a half of the package to the pan and about 2 cups of chicken broth…bring it to a boil.
  • Let the sour cream melt in while the pan is still on high heat, then turn it down and simmer it for 2-3 minutes. Usually the Carbonara sauce would be full of egg yolks and heavy cream. This one is super decadent, but uses chicken broth and then is finished with a few dollops of sour cream..so it is tangy and not as heavy as the other ones you might find out there. Being this light just gives us permission to add more bacon!
  • Evil goodness strikes again…thick cut bacon, roasted in the oven so it cooks to a gorgeous even crisp. Crumble into the simmer sauce with the peas. Don’t ask me how much, but it was most likely 8-10 strips…possibly less because everyone that walked by kept grabbing nibbles of bacon off of the sheet pan.
  • Add a bit few ladles full of hot chicken broth to thin the sauce out a bit. Remember that it will be tossed with the spaghetti squash and a good amount of parmesan before going into the oven; so you don’t want it to be too thick.